
How a Central Air Conditioner Works (Plain English Guide)
A plain-English walkthrough of the refrigeration cycle, what each AC component does, and what SEER2 actually means for your bill.
_1779220400871-BTmzb4Mz.jpg)
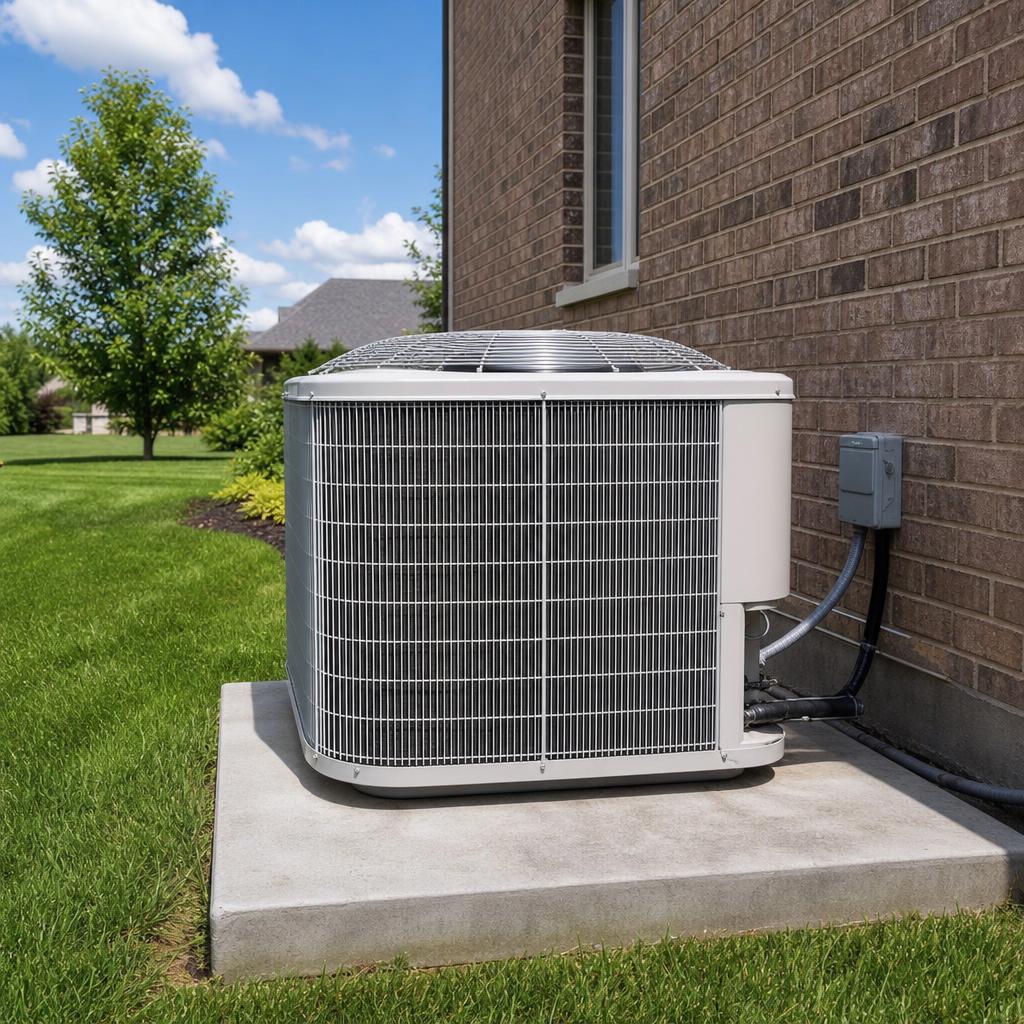
Last July I was on a roof in 102-degree heat looking at a 3-ton condenser someone had walled in on three sides with a cedar privacy fence. The homeowner couldn't figure out why his system was running 18 hours a day and barely keeping the house at 80. Once you understand what a central AC is actually doing (moving heat from inside to outside), the privacy-fence problem becomes obvious.
Quick answer
A central AC does not make cold air. It moves heat. A chemical called refrigerant absorbs heat from your indoor air, gets pumped outside, releases that heat into the outdoor air, and loops back. The four main parts are the compressor, condenser coil, expansion valve, and evaporator coil. Your indoor blower just pushes air across the cold evaporator coil and through the ducts.
The Big Idea: Heat Moves, It Isn't Created
Your AC is not generating cold. It is a heat pump that picks up heat in one place (inside) and dumps it somewhere else (outside). Refrigerant is the messenger. It absorbs heat when it boils into a gas and releases heat when it condenses back into a liquid. That is the whole trick. Everything else is plumbing and electrical to make that cycle happen reliably.
Repair or replace?
Compare free quotes from licensed contractors near you.
The Four Main Components
1. Compressor (Outside)
The compressor is the pump that drives the entire cycle. It takes low-pressure refrigerant gas coming back from inside the house and squeezes it into a hot, high-pressure gas. Squeezing a gas raises its temperature; that is what gets the refrigerant hotter than the outdoor air so it can shed heat. The compressor is the most expensive single component to replace, typically $1,200 to $2,800 installed, which is why a compressor failure on an older system often means replacing the whole unit.
2. Condenser Coil (Outside)
Hot high-pressure refrigerant flows from the compressor through the condenser coil, the aluminum fins on the sides of your outdoor unit. The big fan on top pulls outdoor air through those fins. The refrigerant gives up its heat to the air, cools off, and condenses back into a liquid. This is why outdoor airflow matters so much: clogged fins or boxed-in installations (see the cedar-fence story above) crush capacity fast.
3. Expansion Valve (Indoors, Near the Evaporator)
The high-pressure liquid then flows indoors to the expansion valve (also called a TXV or, on older units, a fixed orifice). The valve drops the pressure suddenly, which makes the refrigerant cold. Think of how a can of compressed air feels freezing when you spray it. Same principle.
4. Evaporator Coil (Inside)
Now the cold low-pressure refrigerant flows through the evaporator coil, which sits in your air handler or attached to your furnace. The blower pushes warm indoor air across this cold coil. Refrigerant absorbs heat from the air (boiling back into a gas), and the now-cooled air goes through your ducts. The warmed-up refrigerant gas heads back outside to the compressor, and the cycle repeats.
The Refrigeration Cycle at a Glance
Liquid → Gas
Gas gets hot
Gas → Liquid
Returns to Step 1
Steps 1 and 4 happen inside your home. Steps 2 and 3 happen in the outdoor unit.
A Useful Side Effect: Dehumidification
Because the evaporator coil is colder than the dew point of your indoor air, water vapor condenses on the coil (the same way water beads up on a cold glass on a summer afternoon). That water drips into a pan and out a condensate drain. A correctly sized AC removes 10 to 20 pints of water per day in a humid climate. This is why an oversized system actually makes a house feel clammy: it cools the thermostat fast and shuts off before it has had time to wring water out of the air.
What Each Component Looks Like in Your House
| Component | Where It Lives | What to Look For |
|---|---|---|
| Compressor | Inside outdoor unit (bottom) | Black cylindrical "can," loudest component |
| Condenser coil | Outdoor unit (sides) | The aluminum fins wrapping the unit |
| Condenser fan | Outdoor unit (top) | Large fan blowing upward |
| Refrigerant lines | Outside wall to indoor unit | Two copper pipes, one insulated |
| Expansion valve | Indoor unit, near evaporator | Small brass valve, usually hidden |
| Evaporator coil | Top of furnace or in air handler | A-shaped coil, usually behind a panel |
| Blower | Furnace or air handler | Cylindrical fan that pushes air through ducts |
| Thermostat | On the wall in living area | Controls when system runs |
Repair or replace?
Compare free quotes from licensed contractors near you.
The Refrigerant Itself: R-410A, R-32, R-454B
For 15+ years, residential systems used R-410A. As of 2025, new U.S. systems are transitioning to lower-GWP (global warming potential) refrigerants like R-32 and R-454B, per the EPA AIM Act. R-22 (used in systems built before 2010) was phased out for new equipment in 2010 and for service refills in 2020.
Worth knowing
You can identify your refrigerant from the data plate on the outdoor unit. Look for a line that says "Refrigerant" or "Charge: R-XXX." If you need a refrigerant repair on an R-22 system, the refrigerant alone runs $80 to $150 per pound as of 2026, often more than the labor cost. Use our HVAC age tool to check whether your system is in the R-22 era.
What SEER and SEER2 Actually Mean
SEER (Seasonal Energy Efficiency Ratio) measures cooling output per unit of electricity over a typical cooling season. As of 2023, the DOE switched to SEER2, which uses more realistic test conditions (higher external static pressure to reflect real duct systems). SEER2 numbers are roughly 4 to 5 percent lower than the equivalent SEER number for the same equipment.
Current federal minimums as of 2026, per the U.S. Department of Energy:
- Northern states: SEER2 14.3
- Southern states: SEER2 14.3
- Southwestern states: SEER2 14.3 (split AC) or 15.2 (single package)
Worked example: A 3-ton SEER2 14.3 unit running 1,000 hours per cooling season at $0.16/kWh costs about $403 per year. The same job done by a SEER2 18 unit costs about $321, a savings of $82. A SEER2 20 unit costs about $289, saving $114. Your payback depends on climate; in Phoenix or Dallas the gap is larger, in Seattle it is smaller.
Why a Bigger System Isn't Better
One of the most common installation mistakes is oversizing. A unit too large for the house cools the air at the thermostat quickly, shuts off, and the cycle starts again a few minutes later. This short cycling creates three real problems.
The compressor wears faster. It is designed for long, steady runs, not constant stop-start cycling. Humidity stays high because meaningful dehumidification requires roughly 15 to 20 minutes of continuous runtime; a 5-minute cycle barely touches it. And rooms far from the thermostat stay uncomfortable because the system satisfies the sensor before conditioned air has had time to fully circulate.
A proper Manual J load calculation (per ACCA Manual J) prevents this. If a contractor quotes a new system without taking any measurements, that is a red flag. See our AC sizing guide for how to read a load calculation.
What Maintenance Does to the System
Annual professional maintenance covers six checks: refrigerant pressure, coil condition (both indoor and outdoor), condensate drain flow, capacitor health, blower motor, and airflow across the evaporator. Skip any one consistently and it compounds on the others.
The check you control between visits is the filter. A clogged filter starves the evaporator coil of airflow. When airflow drops, the coil gets too cold and freezes. Then airflow drops further. The system runs harder while conditioning less. Most 1-inch filters need replacing every 30 to 60 days in a typical home; thicker 4-inch filters can go 6 to 12 months. See our annual HVAC maintenance checklist for a full breakdown by task and frequency.
Common Brand Variations
The core refrigeration cycle is the same across every brand. Where they differ: variable-speed compressors (Carrier, Trane, Lennox) modulate output instead of cycling fully on and off, which cuts humidity problems and extends compressor life. Goodman and Rheem compete primarily on installed cost; their single-stage equipment is reliable but less efficient at partial load. Build quality of contactors and capacitors varies more than most homeowners expect, and those are the components that fail first in all brands.
For lifespan and reliability context by brand, see Carrier, Trane, Lennox, Goodman, and Rheem.
When Something Goes Wrong
Once you know the cycle, most AC symptoms trace directly to one component.
A dirty air filter blocks airflow across the evaporator coil. The coil can't absorb enough heat, gets too cold, and freezes into a block of ice. You'll notice reduced airflow from the registers first, then the system stops cooling entirely. Fix: change the filter, turn the system to fan-only for 4 to 6 hours to let the coil thaw, then restart.
Low refrigerant charge means less heat absorbed per cycle. The system runs longer, struggles to reach the setpoint, and the outdoor unit may ice up at the refrigerant lines. Low charge is almost always a leak because refrigerant does not disappear on its own.
Clogged condenser fins or blocked clearance trap heat in the outdoor unit. The compressor works against back-pressure it cannot handle, the high-pressure switch trips, and the system shuts off and restarts repeatedly. This is exactly what was happening with the cedar fence.
A failed capacitor is the most common summer service call. The compressor or condenser fan cannot start without it. You'll hear a hum or click but the unit will not fully run. A replacement runs $150 to $300 installed and takes about 15 minutes.
For a full symptom list, see our AC not cooling troubleshooting guide.